Before your agent can receive email, you need to connect your domain and create an agent inbox address.Documentation Index
Fetch the complete documentation index at: https://docs.emanate.ai/llms.txt
Use this file to discover all available pages before exploring further.
Prerequisites
- Connected your domain in Emanate (Email → Domains → Add Domain)
- Verified DNS records for your domain
Creating an Agent Inbox
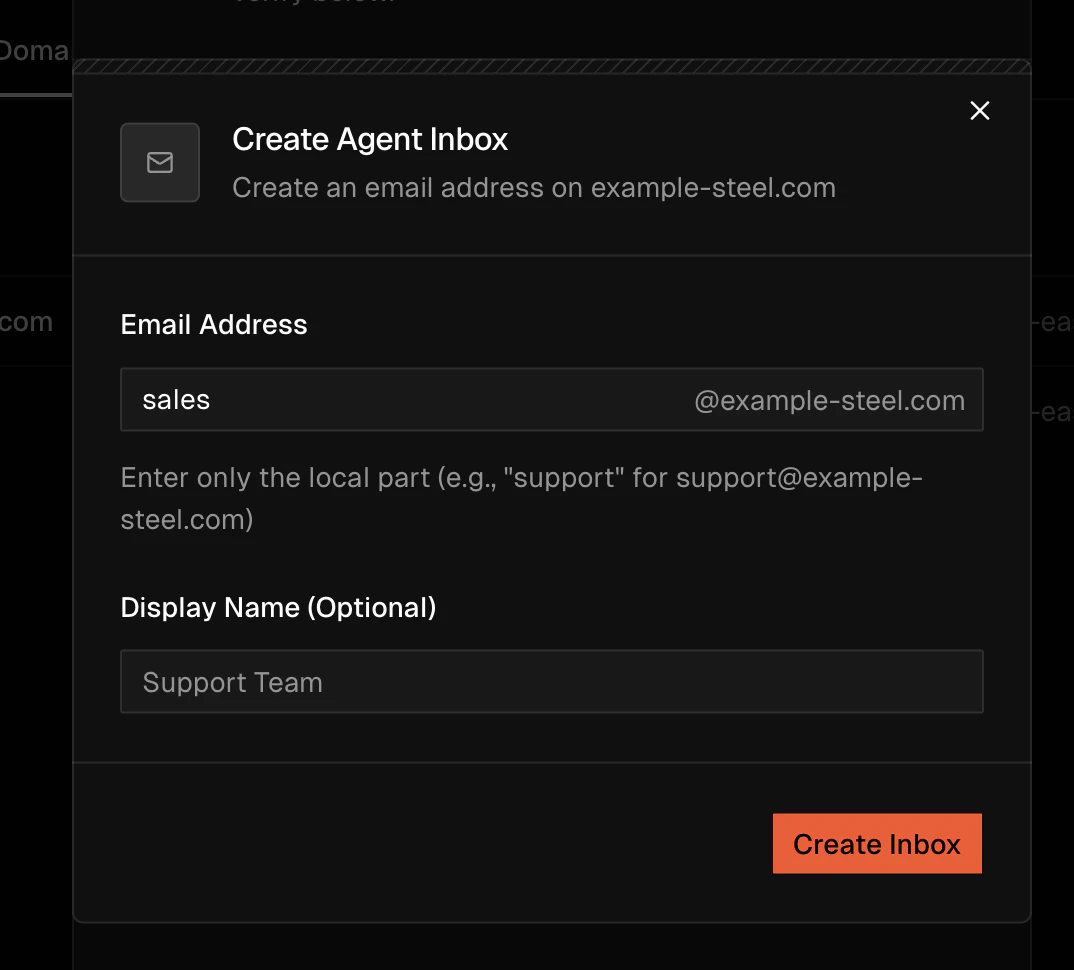
Navigate to Email and select the Domains tab. After your domain is verified, click Create Inbox and fill in:| Field | Description | Example |
|---|---|---|
| Domain | Your verified domain | abc-steel.com |
| Email Address | The local part of the address | sales |
| Display Name | Friendly name (optional) | Sales Team |
sales@abc-steel.com.
Your agent inbox address must match the forwarding destination you configure in your email provider.
Verifying Your Inbox
After creating the inbox:- Send a test email directly to your agent inbox address (e.g.,
sales@abc-steel.com) - Check the Emanate agent inbox — the message should appear within a few minutes
- If the message doesn’t arrive, double-check:
- Your domain DNS records are verified in Emanate
- The inbox address is spelled correctly
Ignore Subject Patterns
Some inboxes receive a lot of noise — automated invoices, calendar invites, support-ticket bot replies — that you never want the agent to process or draft against. Configure ignored subject patterns under Inbox Settings to filter them out before the agent ever sees them:Open Inbox Settings
Navigate to Email → Domains, click the agent inbox row, then open Inbox Settings.
Add Ignore Patterns
Under Ignore subject patterns, add one regex per line. Any incoming message whose subject matches a pattern is silently dropped — no draft, no auto-reply, no inbox history entry.
| Pattern example | Matches |
|---|---|
^Out of Office: | OOO auto-replies |
(?i)delivery (failed|undeliverable) | Bounce notifications |
^Invoice #\\d+ | ERP-generated invoice emails |
Calendar Invitation: | Outlook / Google Calendar invites |
Next Steps
Email Forwarding
Forward your existing inbox to your agent
Knowledge Base
Give your agent context to answer emails accurately