> ## Documentation Index
> Fetch the complete documentation index at: https://docs.emanate.ai/llms.txt
> Use this file to discover all available pages before exploring further.
# Permissions
> Who can open what in your workspace, and how admins see Emanate as a teammate sees it
**Permissions** live on the Settings page, which opens from the gear at the bottom of the sidebar. Admins use the
Permissions tab to decide which parts of Emanate each person can open and what they can do there. Everyone
starts with full access. The switches on this tab only take access away, so a new teammate can use all of Emanate
until you decide otherwise.
## Roles
Every person in the workspace is an admin or a member. The role decides who can manage whom.
| Role | What it can do on the Settings page |
| - | - |
| **Admin** | Invite people, remove members, set permissions for members, and change the Privacy setting. An admin cannot restrict another admin. |
| **Member** | Sees who is in the workspace and edits their own name and email. The Permissions tab is not shown. |
Two rules follow from the roles:
* **Admins restrict members, not each other.** Select another admin and their switches are read-only.
* **You cannot change your own switches.** Your own row is marked (you), and the panel is read-only when you select it. This is what makes it impossible to lock yourself out.
The Users tab holds Invite User, which sends an invitation with a role attached, Remove on a person's row, and
Revoke on a pending invitation.
A few actions belong to the role itself and cannot be granted with a switch. Deleting in a number of places,
connecting integrations, deploying workflows, bulk imports and managing workspace-wide Intelligence skills need
Admin.
## The Permissions tab
Choose the gear at the bottom of the sidebar, then the Permissions tab. Only admins see the tab.
The list on the left shows everyone in the workspace with their email. Type in Search people to find someone, or
narrow the list with the role filter. The header on the right summarizes the person you picked: Full access to
everything, or how many features are restricted.
Every change saves the moment you flip it. There is no Save button. If a save fails, the switch flips back and a
message tells you why.
### The four switches
Features are grouped under the same sections as the sidebar: Home, Inbound, Growth, Observe and Resources. Each
feature row carries up to four switches.
| Switch | What it controls |
| - | - |
| **View** | Open the page and see it in the sidebar. Turning View off also turns off Create, Edit and Delete for that feature and locks them until View is back on. |
| **Create** | Add new records: a lead, a sequence, a monitor, a custom tactic. |
| **Edit** | Change what already exists, including the feature's settings. |
| **Delete** | Remove records. |
A dash in a column means that action does not apply to the feature.
View is the only switch that changes what a person sees. Create, Edit and Delete are checked when the person tries
the action: on most pages the buttons stay where they are, and the attempt is refused with a message saying they do
not have that access.
### What each feature covers
| Section | Feature | Switches |
| - | - | - |
| **Home** | Agent Inbox | View, Create, Edit |
| | Tactics | View, Create, Edit, Delete |
| | Tasks | View, Edit |
| **Inbound** | Demand | View, Create, Edit, Delete |
| | Channels | View, Create, Edit, Delete |
| **Growth** | Autopilot | View, Create, Edit |
| | Leads | View, Create, Edit, Delete |
| | Accounts, including Contacts | View, Create, Edit, Delete |
| | Expand | View, Create, Edit, Delete |
| | Sequences | View, Create, Edit, Delete |
| | Monitors | View, Create, Edit, Delete |
| | Segments | View, Create, Edit, Delete |
| **Observe** | Intelligence | View, Create, Edit, Delete |
| | Pricing | View, Edit |
| | Learnings | View, Edit |
| | Map | View, Create, Edit, Delete |
| | Logs | View, Edit |
| **Resources** | Business DNA | View, Create, Edit, Delete |
| | Knowledge Base | View, Create, Edit, Delete |
| | Integrations, including phone numbers | View, Create, Edit, Delete |
| | Custom Actions | View, Create, Edit, Delete |
Email threads are shared across features. A person who can view any of Demand, Accounts, Leads, Sequences,
Learnings, Logs or Tactics can still open a customer's thread from those pages, so turning off Demand alone does not
hide a conversation that an account page shows.
### Reset to full access
When a person has restrictions, a Reset to full access button appears above their switches. It asks you to confirm,
then turns every switch back on so they can open and use all of Emanate.
### Presets
A preset is a saved set of switches you can apply to anyone. The Apply preset menu sits above the switches.
* **Save current as preset** keeps the selected person's switches as a named set, for example Sales rep.
* **Apply a preset** to the selected person after a confirmation. Every switch is set to match the preset, and
anything you changed by hand for that person is overwritten.
* **Manage presets** opens the list of saved presets. From a preset's menu you can Rename it, Apply to all members,
or Delete it. Apply to all members sets every person with the Member role to that preset in one go. Admins are
left alone.
A preset is a copy, not a link. Renaming or deleting a preset later leaves the people you already applied it to
exactly as they are.
## What a restricted person sees
* **In the sidebar**, the feature's row stays in place but is dimmed, with a small lock on the right.
* **On the page**, they see You don't have access to that feature, with a line that says to ask an admin, who can turn
it on in Settings → Permissions.
A lock means someone in your company restricted the feature. A page that says the feature isn't part of your
workspace means something different: the product is not in your plan. Those rows are hidden from the sidebar
entirely, for admins too, and the page points you to your Emanate contact.
## Seeing Emanate as a teammate sees it
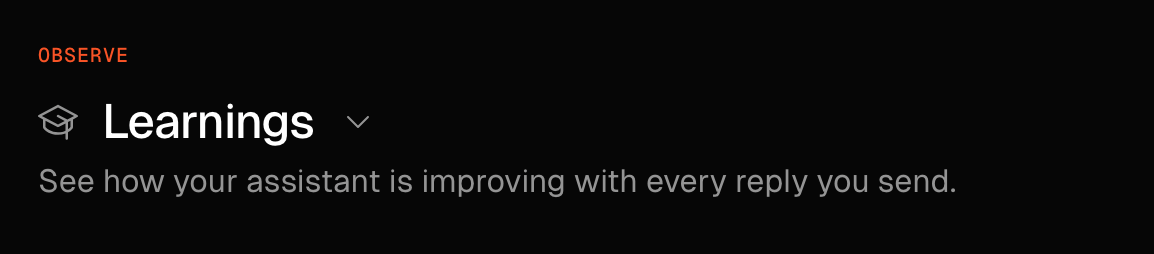
Three pages carry a small dropdown menu beside the page title. Click the dropdown menu, the chevron next to the
title, to switch whose page you are looking at. Pick a name and the title becomes their name followed by the page,
such as Sam Lee's Learnings.
 | Page | Who gets the dropdown | Rows in the menu |
| - | - | - |
| **Agent Inbox** | Admins | My Home, then every teammate |
| **Tactics**, the list and every tactic page | Admins | My Tactics, then every teammate |
| **Learnings** | Admins | Everyone, then My Learnings, then every teammate |
Members never see the dropdown. The choice is kept in the page address, so you can bookmark a teammate's view or send
the link to another admin. Someone without the role who opens that link sees their own page. Moving to another page
from the sidebar returns you to your own view, and picking My Home, My Tactics or My Learnings from the menu does the
same.
### A teammate's Home
The page becomes their Home and shows their activity, attention items, recent accounts, automations and Rundown. You
can chat with their assistant and draft or send replies on their behalf. Proposal cards are read-only, and the
Rundown's weigh-in and Profile pane belong to the teammate, though you can start a fresh edition with Build now.
Replies drafted or sent from a teammate's Home go through that teammate's own connected mailbox. An admin in this
view can read and act on that person's mail through their assistant.
### A teammate's Tactics
The page acts on their behalf. If they have no assistant yet, it offers to set one up for them. Otherwise you can
turn their tactics on or off, change any tactic's settings, press Run now, read every tactic's Activity, decide
check-in approvals, and add a library tactic to their list, which starts off until someone turns it on. Two things
stay personal: only the teammate can connect their own inbox, because it needs their sign-in, and only the author of a
custom tactic can share it to the library. On a tactic's own page the breadcrumb reads their name, and it takes you
back to their list.
### A teammate's Learnings, or everyone's
Choose Everyone and the page becomes Team Learnings: a People table with each person's Progress, AI-assisted replies
and Draft accuracy. Click a row to open that person. The team view never shows email content.
Choose a person and you see their Learnings. The Assistant Learning tab shows their progress and Draft vs. sent, the
assistant's draft next to the reply they actually sent, plus suggested rules under Waiting on review. Approve and
Dismiss on those rules are for the teammate themselves, so you see them disabled. The Per Account
Agents tab shows how that rep is using the agents working their accounts and what came of it.
## Where changes are recorded
Every permission and preset change, along with invitations, role changes and removals, is listed on the Activity tab
of [Logs](/logs/overview) with who made it and when. Anyone who can view Logs can read it.
## Related settings
* **Privacy**, on the Settings tab of the same page: Limit interactions to each person's own threads. When it is on,
members only see the email conversations they are on, admins keep the full view, and shared team mailboxes
stay visible to all. Admins can change it.
* **Your assistant** explains what an admin can do from a teammate's Home and Tactics in the context of the assistant
itself. See [Your assistant](/getting-started/your-assistant#admins-your-teams-assistants).
This documentation is built and hosted on [Mintlify](https://mintlify.com), a developer documentation platform.
| Page | Who gets the dropdown | Rows in the menu |
| - | - | - |
| **Agent Inbox** | Admins | My Home, then every teammate |
| **Tactics**, the list and every tactic page | Admins | My Tactics, then every teammate |
| **Learnings** | Admins | Everyone, then My Learnings, then every teammate |
Members never see the dropdown. The choice is kept in the page address, so you can bookmark a teammate's view or send
the link to another admin. Someone without the role who opens that link sees their own page. Moving to another page
from the sidebar returns you to your own view, and picking My Home, My Tactics or My Learnings from the menu does the
same.
### A teammate's Home
The page becomes their Home and shows their activity, attention items, recent accounts, automations and Rundown. You
can chat with their assistant and draft or send replies on their behalf. Proposal cards are read-only, and the
Rundown's weigh-in and Profile pane belong to the teammate, though you can start a fresh edition with Build now.
Replies drafted or sent from a teammate's Home go through that teammate's own connected mailbox. An admin in this
view can read and act on that person's mail through their assistant.
### A teammate's Tactics
The page acts on their behalf. If they have no assistant yet, it offers to set one up for them. Otherwise you can
turn their tactics on or off, change any tactic's settings, press Run now, read every tactic's Activity, decide
check-in approvals, and add a library tactic to their list, which starts off until someone turns it on. Two things
stay personal: only the teammate can connect their own inbox, because it needs their sign-in, and only the author of a
custom tactic can share it to the library. On a tactic's own page the breadcrumb reads their name, and it takes you
back to their list.
### A teammate's Learnings, or everyone's
Choose Everyone and the page becomes Team Learnings: a People table with each person's Progress, AI-assisted replies
and Draft accuracy. Click a row to open that person. The team view never shows email content.
Choose a person and you see their Learnings. The Assistant Learning tab shows their progress and Draft vs. sent, the
assistant's draft next to the reply they actually sent, plus suggested rules under Waiting on review. Approve and
Dismiss on those rules are for the teammate themselves, so you see them disabled. The Per Account
Agents tab shows how that rep is using the agents working their accounts and what came of it.
## Where changes are recorded
Every permission and preset change, along with invitations, role changes and removals, is listed on the Activity tab
of [Logs](/logs/overview) with who made it and when. Anyone who can view Logs can read it.
## Related settings
* **Privacy**, on the Settings tab of the same page: Limit interactions to each person's own threads. When it is on,
members only see the email conversations they are on, admins keep the full view, and shared team mailboxes
stay visible to all. Admins can change it.
* **Your assistant** explains what an admin can do from a teammate's Home and Tactics in the context of the assistant
itself. See [Your assistant](/getting-started/your-assistant#admins-your-teams-assistants).
This documentation is built and hosted on [Mintlify](https://mintlify.com), a developer documentation platform.